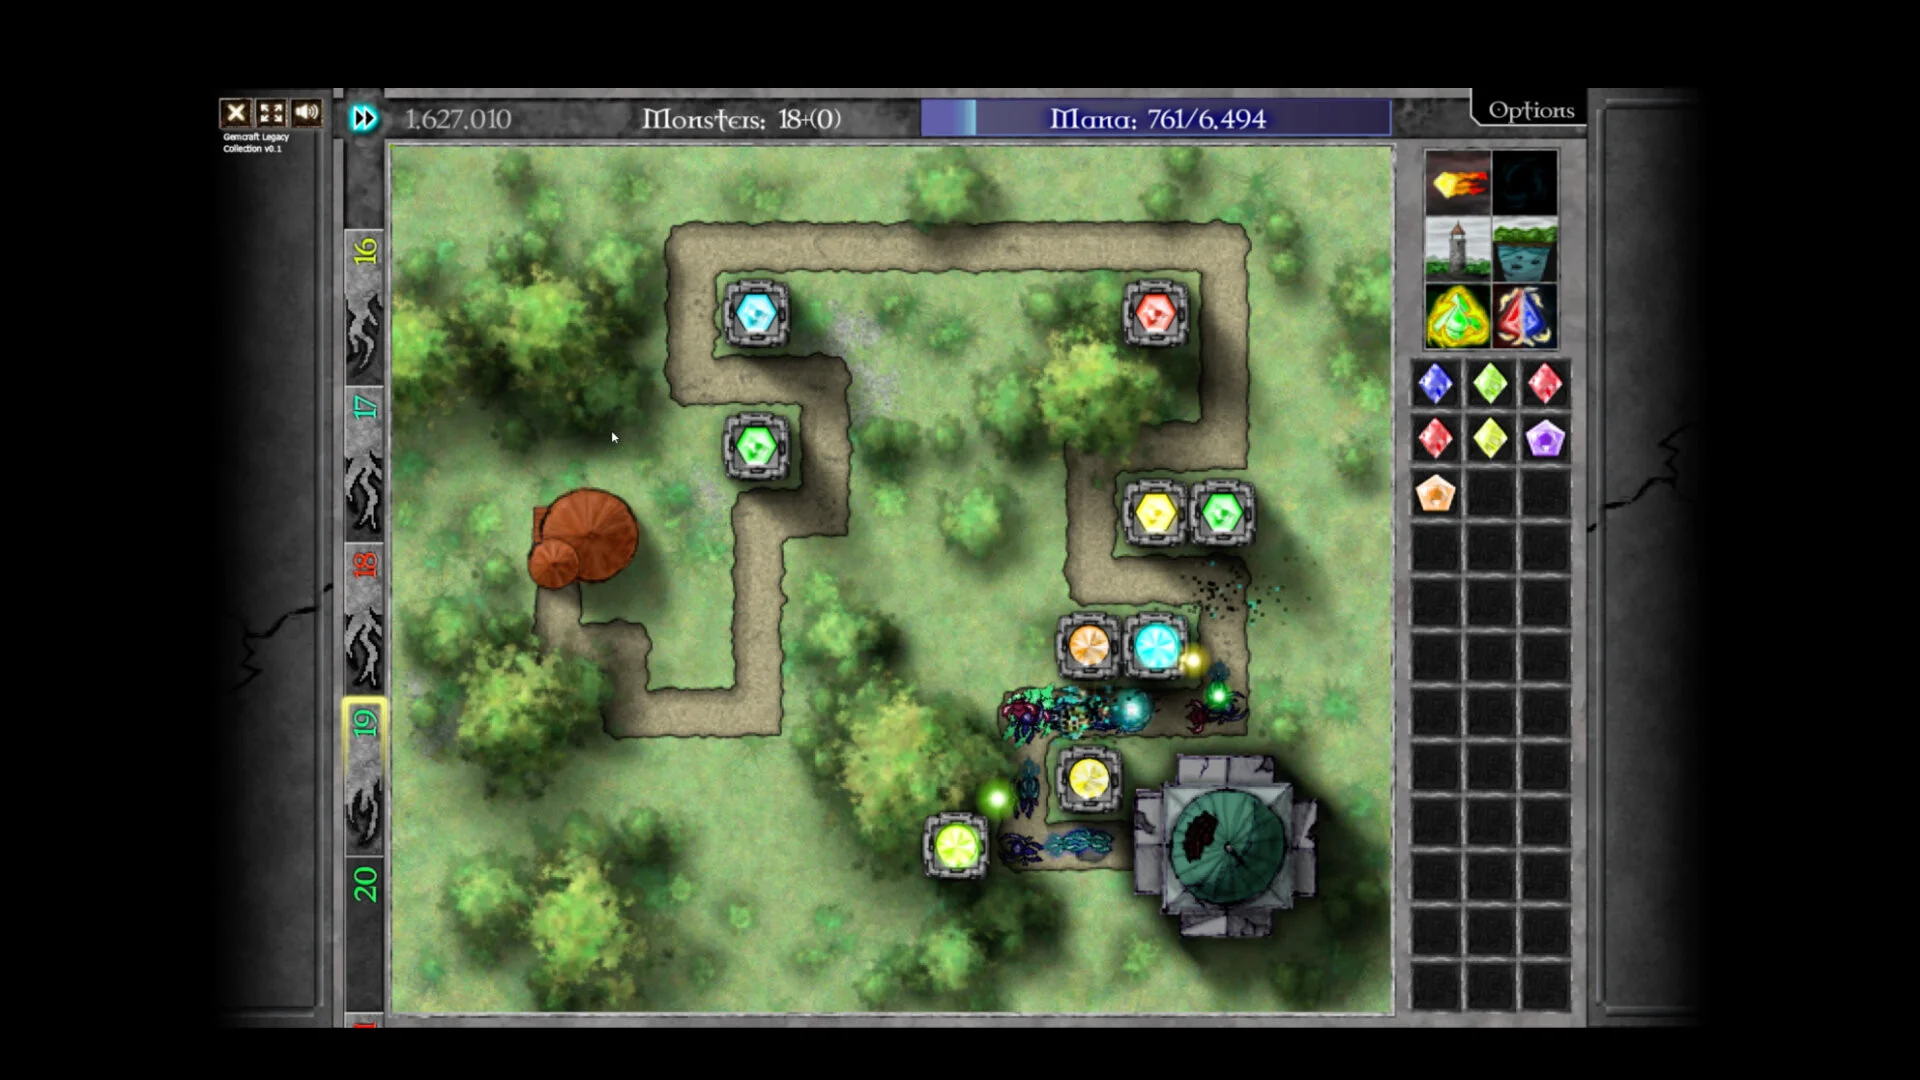
- GemCraft Legacy Collection Level 5 is an early skill-check where mana discipline first matters.
- Best opening: one damage tower at a path overlap, then a slowing trap on the longest segment.
- Core gems: red damage plus white slow covers nearly every early wave on this field.
- Common failure: combining every gem immediately and losing mana for emergency builds.
- Wave control: use pause before spending mana and hold spells for overlapping waves.
Level 5 Overview and Why It Stops New Players
GemCraft Legacy Collection Level 5 sits in the opening stretch of the first included campaign, where the game stops handing you easy waves and starts testing whether you understand gem combining, tower placement, and mana management at the same time. The field introduces denser mixed waves than earlier levels, so a single damage gem with no support begins to leak enemies.
Video Highlights:
- Official trailer confirms the three included games and the core gem-forging loop
- Over 100 hours of content and 385 achievements across the collection
- Steam version adds speed controls, hotkeys, and performance improvements
Level 5's key characteristics are summarized below:
| Feature | Details | Difficulty Impact |
|---|---|---|
| Path layout | Multiple converging segments near the exit | Medium — rewards central towers |
| Wave pressure | Mixed normal and fast enemies | Medium — demands a slow effect |
| Starting mana | Limited early budget | High — punishes early over-combining |
| Best gem colors | Red damage, white slow | Low — both affordable early |
| Recommended skill level | Basic damage and range invested | Low — early campaign skills suffice |
Before placing anything, identify the longest shared path segment. That location gives your tower the most attack time per enemy and should receive your first and strongest gem, not a corner position enemies pass quickly.
Step-by-Step Level 5 Walkthrough
Follow this sequence to clear Level 5 reliably on a first or second attempt. The plan prioritizes coverage first, then upgrades.
| Step | Action | Mana Budget | Purpose |
|---|---|---|---|
| 1 | Build one tower at the central path overlap | Low | Establish a dependable firing line |
| 2 | Place a red damage gem in the tower | Low | Handle normal early waves |
| 3 | Add a trap with a white slowing gem on the long segment | Medium | Extend enemy exposure to the tower |
| 4 | Bank mana through two waves | None | Grow the pool for the first upgrade |
| 5 | Combine gems into a grade-2 damage core | Medium | Scale damage before fast waves |
| 6 | Hold a control spell for overlapping waves | Low | Stop leaks near the exit |
Establish the Central Kill Zone
Place your first tower where two or more path segments overlap. This single decision determines how much total damage every later gem investment is worth. Avoid spreading early mana across multiple weak positions.
Add Control Before More Damage
Once the damage tower handles normal enemies, spend the next mana on a slowing trap on the longest path section. Slowing increases the time enemies stay inside tower range, which multiplies your existing damage instead of replacing it.
Grow Mana Before Combining
Do not combine every gem immediately. Clear one or two waves with your existing setup and let kills and mana income build the reserve. Combine only when the resulting gem immediately gains better range, damage, or control than the gems consumed.
Respond to Wave Composition
Pause before each wave, watch which enemies survive the first pass, and adjust: armor-tearing against armored survivors, more slow against fast units breaking away, chain-hit when groups travel together.
Reserve the Final Spell
Keep one control or burst spell unused until the final overlapping waves. Spending every charge early is the most common reason strong openings still leak enemies at the end of the level.
If combining leaves an entrance uncovered or drains your mana before a difficult wave, the upgrade is a net loss. Coverage and a mana reserve beat a single high-grade gem on this field.
Best Gems and Builds for Level 5
Level 5 does not demand exotic gem combinations. The strongest options are the ones that solve the field's actual problems: mixed waves, limited mana, and a shared central path.
Standard Kill-Zone Build
- Red damage gem in central tower
- White slow trap on long segment
- Best for first clear and learning the field
Swarm Control Build
- Yellow chain-hit gem for grouped waves
- Slow support gem at the first bend
- Best when waves overlap heavily
Safety-First Build
- Damage tower plus a backup gem near the exit
- Reserved control spell for final waves
- Best for players who leaked enemies previously
| Gem | Role on Level 5 | Rating | Notes |
|---|---|---|---|
| Red (damage) | Primary wave clearing | ★★★★★ | Core of every build here |
| White (slow) | Extends tower attack time | ★★★★★ | Cheapest big value on this field |
| Yellow (chain hit) | Multi-target coverage | ★★★★ | Strong when waves travel in groups |
| Orange (armor tearing) | Counters armored survivors | ★★★ | Situational, add mid-battle |
| Blue (mana steal) | Resource support | ★★★ | Useful only if waves last long enough |
| Lime (poison) | Damage over time | ★★ | Outclassed by direct damage early |
Upgrade the gem that is already positioned well before creating weaker replacements. A grade-2 gem in the central tower outperforms two grade-1 gems in poor locations.
Common Mistakes and How to Fix Them
| Mistake | What Happens | Fix |
|---|---|---|
| Combining everything at wave 1 | No mana for emergency builds | Keep a reserve of at least one active gem plus spell cost |
| Tower in a corner | Enemies exit range quickly | Reposition to the longest shared segment |
| One damage type all battle | Armored or fast enemies survive | Observe survivors each wave and add a second effect |
| Spending all spells early | Leaks during final waves | Hold one control spell for wave overlap |
| Ignoring traps | Missed repeated-contact value | Add a slow or poison trap on the long path |
Fast units that break away from the group are the top leak cause on this level. Set your tower's targeting to prioritize fast enemies approaching the exit before they leave range.
Pause before making expensive changes. Inspecting the battlefield while paused prevents rushed gem combines and poorly timed spell casts during overlapping waves.
Level 5 Completion Checklist
Clear Level 5 Efficiently:
- Build the first tower at the central path overlap
- Add a slowing trap on the longest path segment
- Combine gems only when coverage is not lost
- Hold one spell for the final overlapping waves
- Clear without leaking enemies to the Orb
After clearing Level 5, carry the same principles forward: coverage first, control second, upgrades third. Later fields in the collection add battle settings, traits, and endurance modifiers, but the core discipline learned here applies across GemCraft, Chapter 0, and Labyrinth.
FAQ
Q: Is Level 5 in GemCraft Legacy Collection hard?
Level 5 is an early skill-check rather than a hard wall. It becomes difficult only when you combine all gems immediately or place towers where enemies pass quickly. One central damage tower plus a slowing trap clears it consistently.
Q: What are the best gems for Level 5?
A red damage gem in a tower at the path overlap, supported by a white slowing gem in a trap, handles nearly every wave. Add yellow chain-hit if waves overlap heavily, or orange armor tearing if armored enemies survive your damage.
Q: Should I combine my gems right away on Level 5?
No. Combining too early reduces map coverage and drains the mana you need for emergency gems and spells. Clear a couple of waves first, then combine when the new gem immediately gains better range, damage, or control.
Q: Do the other games in the collection change how Level 5 works?
The Legacy Collection includes GemCraft: The Forgotten, Chapter Zero, and Labyrinth, each with its own campaign progression. Level 5 belongs to the first game's campaign, and its unlocks do not carry over as codes into the other chapters.